I. Vaikuma lüliti tavalise tööaegu kontrollimine
1. Kontroll suletud (SÜNDM) asendis
Töötlemise mehhanism peaks olema suletud asendis;
Peamise telje rull peaks olema lahutatud õliamortisaatorist;
Ava veerand peaks olema laetud (venitatud) energiakogumisasendis;
Vaikuma katkuri liiguvate kontaktide vahekaadi pikkus, mis on nähtav juhibordi all, peaks olema umbes 4–5 mm;
Vaikuma katkuri sees olevad kõrged peaksid olema nähtavad (see ei kehti keramiik-tubade katkuri puhul);
Üleval ja all paiknevate kandja temperatuurinäitajalised etiketid peaksid näitama olulist muutust.
2. Joobivuse osade kontroll
Üleval ja all paiknevate kandjate välised ühendussilmad;
Silmad, millega vaikuma katkur on kinnitatud ülemisele kandjale;
Silmad, mis on allosas asuvas kandja joobivuse kleepsul.
Kõik eelnimetatud silmad ei tohi olla löödud.
3. Ülekandekomponentide kontroll
Kolm pöördelülit, mis ühendavad linki käte ja katkuri liikuva otsa, sealhulgas mõlemate otsade kinnitused;
Lukusilmad ja vastassilmad, mis kinnitavad vedurit linki kätega;
Kuus M20-silma, mis kinnitavad toetuse isolaatoreid (vaikuma katkuri raamis);
Paigaldussilmed, mis kinnitavad vaikuma katkuri;
Lukusilm ja vastassilm, mis ühendavad mehhanismi peamise telje katkuri linki kätega;
Ülekande ühenduslülite tahtrikud, et tuvastada mahlapüksed või murdmed;
Peamise edasijõe telje pinaksed, et kontrollida nende löödumatust või lahutamist.
Ärge asetage mitte mingi objekt vaikuma katkuri staatilise raami peale, et vältida nende kukkumist ja vaikuma katkuri kahjustamist.

4. Vaikuma katkuri sisemine kontroll
Kontaktide erosi kontroll
Pärast mitmeid lühitinglikku elektri katkestamist võib vaikuma katkuri kontaktidel ilmneda erosioon elektriaruka põhjal. Kontaktide kaotus ei tohi ületada 3 mm. Kontrollimeetodid hõlmavad: katkuri kontaktide vahekaardi mõõtmist ja võrdlust varasemate tulemustega; ringjoone vastupanu mõõtmist DC vastupanumeetodiga; selgelt nähtavaid muutusi kompressioonireisil. Kui kontaktide erosioon on toimunud, kuid sätted saadakse tagasi spetsifikatsioonidesse, võib katkur jätkata tööd (koos täieliku hindamisega).
Katkuri vaikuma täielikkuse kontroll
Visuaalselt kontrollige vaikuma katkuri klaasi (või keramiik-seina) kriipsude või kahjustuste olemasolu; kontrollige katkuri mõlemate otsade tahtrikke deformatsiooni, nihkumise või lahutamise korral. Lahutage veduri ja linki käte vaheline pinaks, seejärel kontrollige käsitööliselt, kas kontaktide vahekaad automaatselt tagasi liigub—tagades, et liiguv kontakt jääb suletud asendisse (välise atmosfäärilise rõhu tõttu). Kui hooldusjõud on nõrk või ei toimu tagasi liikumine, on vaikuma taseme tõenäoliselt vähenenud.
Kasutage võrketinglase vastupidavuse testi kvalitatiivseks kinnitamiseks. Näiteks, kui 10 kV vaikuma katkuril on isolatsioonikindlus alla 42 kV, viitab see vaikuma taseme vähenemisele ja katkur tuleb asendada.
II. Vaikuma katkuri kontroll ebatavalisel tööperioodil
1. Vaikuma kamberi kahjustus
Kui patrullkontrolli käigus avastatakse vaikuma kamberi kahjustust, kuid maandamine või lühitinglik pole veel toimunud, teavitage kohe dispetšeri, ülekandage laad kohaliku linna võrgule ja keelake uuesti sulgemise releeliit.
2. Ebatavaline vaikuma taseme tööperioodil
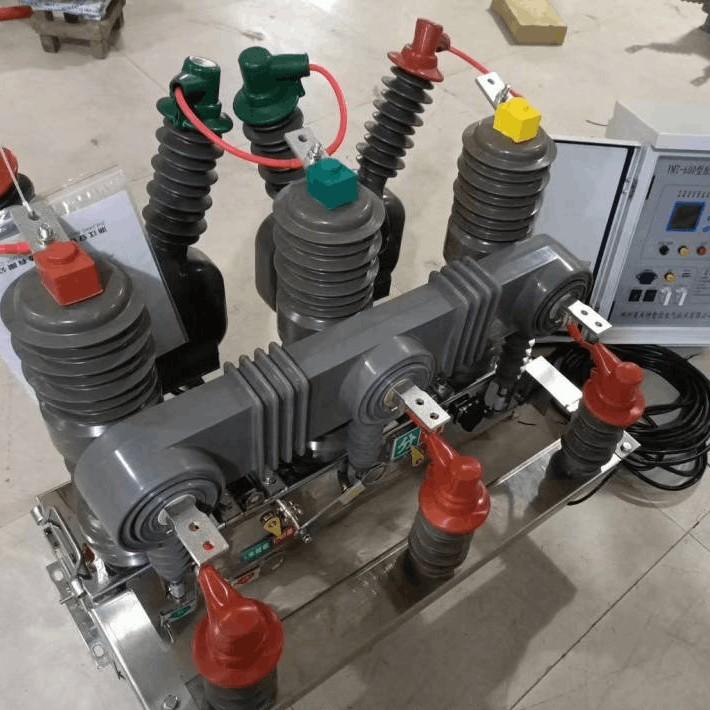
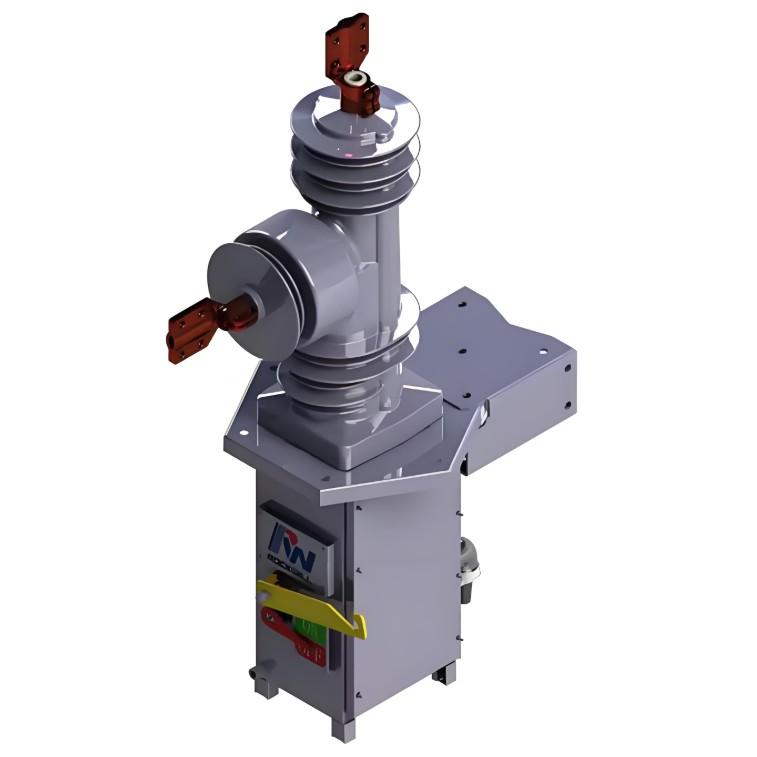
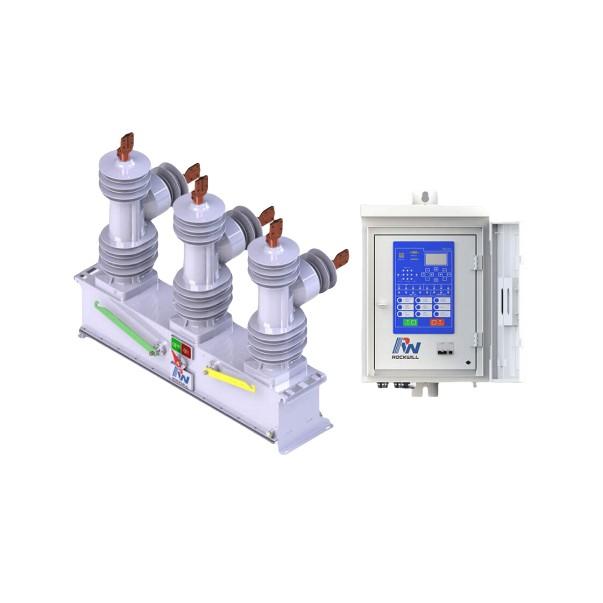
Vaikuma katkurid kasutavad kõrget vaikumat insuleerimiseks ja elektriaruka sissetungimiseks tõenäosuse tõttu. Nad näitavad häid elektriaruka sissetungimisomadusi, vajavad vähe hooldust, omavad pikka tööelu, toetavad sageli tööd, töötavad usaldusväärselt ja sobivad 6–35 kV seadmete sulgemiseks, nagu kõrgepinge motorid, kondensaatoripangad ja muud siseseadmed. Kontaktid on tavaliselt valmistatud kupar-kromi leegliseest, mille mõõtlik vool on kuni 1000–3150 A, ja mõõtlik katkestusvool on kuni 25–40 kA.
Täispõhiline katkestusvõime võib ulatuda 30–50 operatsioonini. Enamus on varustatud elektromagnetiliste või veerandi mehhanismidega. Katkuri vaikuma taseme tuleb hoida üle 1.33 × 10⁻² Pa, et tagada usaldusväärne töö. Kui vaikuma taseme langab selle väärtusest, ei saa elektriaruka sissetungimist garanteerida. Kuna vaikuma taseme välimalmimine on raske, määratakse kvalifikatsioon tavaliselt läbi võrketinglase vastupidavuse testi.Tavalise kontrolli käigus jälgige kaitse (ekraani) värvi ebatavalisi muutusi. Erilist tähelepanu pöörake katkuri avamisel ilmnema elektriaruka värvi. Tavalistes tingimustes on elektriaruka värv helesinine; kui vaikuma taseme langab, muutub elektriaruka oranjapunane—mis näitab, et tuleb paluda väljalülitamist, kontrolli ja vaikuma katkuri asendamist.
Vaikuma taseme languse peamised põhjused hõlmavad: halva materjali valikut, ebapiisavat tiheitust, vigastatud metallsete kõrgede tiheitust, üleliigset reisi, mis ületab kõrge disainitud valdkonna, või üleliigset mõjujõudu.
Lisaks kontrollige üleliigset reisi (st mõõtke kontaktide sõrmereis). Kui kumulatiivne sõrmereis ületab määratud piiri (4 mm), tuleb vaikuma katkur asendada.
III. Vaikuma katkurite tavalised vead ja probleemide lahendamine
1. Elektrilise sulgemise ebaõnnestumine
Põhjus: Solenooidi tuum ja vedur on lahutatud.
Lahendus: Korrigeerige solenooidi tuumi asukohta—eemaldage stabiilne tuum, et korrigeerida—nii et manuaalne sulgemine oleks võimalik. Sulgemise lõpus tagage, et lukus ja rulli vahel oleks 1–2 mm vaba ruum.
2. Lukkimine ilma lukituseta ("tühi lukkus")
Põhjus: Lukituse kaugus on ebapiisav—lukitus ei läbi pöördetund.
Lahendus: Keera korrigeerimisscrew välja, et lukitus läbib pöördetund. Pärast korrigeerimist kirista screw ja märgista see punase värviga.
3. Elektrilise avamise ebaõnnestumine
Lukituse kaugus on liiga suur. Keera screw sisse ja kirista lukusnut.
Avamiskoilile kulgeb elektriliin. Ühenda ja kinnita terminalid.
Tööpinge on madal. Korrigeeri juhitav pingevool määratud tasemeni.
4. Sulgemise või avamise koilide kuumenemine
Põhjus: Abikaasa lüliti kontaktide puudulik kontakt.
Lahendus: Puhasta kontaktid habrasandiga või asenda abikaasa lüliti; asenda vajalikult vigane sulgemise või avamise koil.