UHV (Ultra-High Voltage) substations are a critical component of power systems. To meet the fundamental requirements of power systems, the associated transmission lines must remain in good operational condition. During the operation of UHV substations, it is essential to properly implement the inter-bay jumper installation and construction techniques between structural frames to ensure rational interconnection among the frames, thereby fulfilling the basic operational needs of UHV substations and comprehensively enhancing their service capabilities.
Based on this, this paper investigates the jumper installation and construction techniques used in UHV substations, analyzes specific inter-bay jumper installation methodologies, ensures effective application of these construction techniques, guarantees proper connections between structural frames, and ultimately promotes the enhancement of substation service capabilities to satisfy the corresponding demands of the power system.
1.Overview of UHV Substations
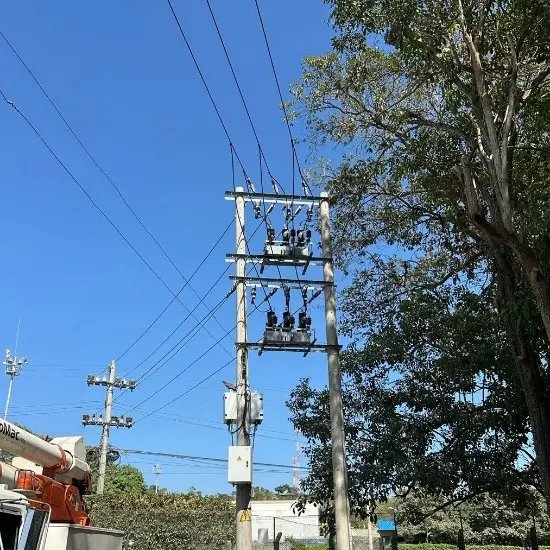
UHV substations represent a fundamental measure for enabling efficient electric power transmission within power systems. In current power systems, large-scale power plants are often located far from load centers. Therefore, the electricity generated at these plants is typically transmitted via step-up substations that increase voltage levels before long-distance transmission. This enables power to be delivered in accordance with relevant standards, meeting the basic requirements for power delivery to load centers. At the load centers, lower-voltage distribution networks then perform graded power distribution to deliver electricity to end-users at various voltage levels, fully satisfying user electricity demands.
UHV substations function as step-up substations specifically designed for long-distance, high-capacity power transmission and serve as the foundation for stable operation of the entire power system. In practical operation, the active power transmitted through a three-phase AC transmission line is given by:
P = √3 × U × I × cosφ = I²R (1)
According to the above formula, when the transmitted power is constant, the higher the transmission voltage level, the lower the current, allowing the use of conductors with smaller cross-sectional areas. Thus, during transmission, UHV substations effectively reduce the cost of power delivery and enable reasonable control over transmission expenses. Power losses and energy dissipation in the lines are correspondingly reduced, and transmission distance is significantly extended (e.g., 10 kV lines transmit over 6–20 km, 110 kV over 50–150 km, and 220 kV over 100–300 km).
It is evident that employing UHV substations helps lower power transmission costs. Therefore, to meet the basic service requirements of power systems, proper management of UHV substations is essential to ensure their service capability, fulfill practical operational needs, minimize interference and adverse impacts, comprehensively enhance the operational performance of UHV substations, and guarantee compliance with normal power system operation standards.
2. Research on Inter-Bay Jumper Installation Construction Techniques
Considering the fundamental characteristics of UHV substations, this section studies the jumper installation techniques applied between structural frames, aiming to fully leverage the service capabilities of UHV substations and ensure they provide superior support to the power system in actual operation. Therefore, a detailed investigation of jumper installation techniques is necessary, as outlined below.
2.1 Construction Process Flow
To meet practical operational requirements, jumper installation must be carried out rationally according to a well-defined process flow, thereby improving construction quality and ensuring reliable jumper performance. The quality of inter-bay jumper installation directly determines the overall progress and quality of substation construction. Hence, it is crucial to accurately calculate the required conductor cutting length, ensuring high precision in calculations so that field personnel can carry out prefabrication and hoisting based on these results. Repeated mock-ups, comparisons, and empirical analyses should be conducted to effectively control the construction process.
To satisfy specific jumper installation requirements, the construction process shown in Figure 1 should be followed to ensure compliance with UHV substation standards and guarantee substation service performance. The detailed construction methodology can be referenced in the basic content illustrated in Figure 1.

2.2 Construction Preparation
Prior to construction, adequate preparatory work must be carried out, including studying the inter-bay jumper design scheme for UHV substations. By analyzing the basic conditions of the jumper spans, the design can be ensured to be rational and meet actual construction requirements, reduce safety hazards, and comprehensively enhance the design’s service capability.
Next, construction materials required during the construction phase should be prepared, and equipment inspection and testing must be performed to ensure that equipment quality meets relevant standards.
In addition, to guarantee the quality of jumper installation, control measures for the jumper spans must be implemented. This includes analyzing relevant jumper span parameters and performing necessary calculations to ensure smooth subsequent construction.
Afterward, proper technical briefing must be conducted to ensure that all construction personnel fully understand the key points of the jumper installation process and can effectively implement the required techniques, thereby ensuring construction quality.
2.3 Insulator String Assembly
Based on the basic conditions of the construction process, after completing the preliminary preparations, insulator string assembly can proceed. In actual installation, first carry out quality control of the insulator strings by conducting withstand voltage tests to verify their qualification. Then, combined with prior quality inspections, visually examine the appearance and quality of the insulator strings to ensure they meet requirements.
After confirmation, review the insulator string design drawings to check for potential interference or collision issues. If no such issues exist, proceed with installation. Note that during installation, the opening directions of all spring pins must be uniformly aligned to ensure their performance meets operational requirements and achieves desired construction results.
During insulator string assembly, care must be taken to avoid damage during lifting. A structure with alternating large and small sheds (sheds refer to the umbrella-like discs on insulators) can be adopted, and shed spacing must be properly controlled. Additionally, anti-aging measures should be applied to the insulator strings. Construction personnel are strictly prohibited from stepping on the insulators or allowing sharp objects to scratch them, ensuring the insulator strings remain in good condition during lifting and meet subsequent usage requirements.
Before lifting, tensile strength tests, electrical performance tests, and insulation aging tests must be conducted to ensure the insulator strings possess sufficient mechanical strength and stability, preventing damage during hoisting.
Furthermore, collisions between insulator strings must be avoided. Proper fixation of the strings is essential, and appropriate fastening devices should be reasonably utilized to meet construction requirements.
2.4 Measurement and Calculation
This step begins with calculating the connection positions. Based on the calculation results, corresponding field measurements are then carried out to ensure data accuracy and meet construction needs.
Next, the conductor cutting length must be calculated. This calculation directly affects the installation quality of the flexible busbar, as any error will influence the busbar’s sag. Therefore, multiple site verifications should be integrated into the design control process.
First, determine key calculation parameters, primarily including: insulator string length, span distance between suspension points, sag, and conductor weight. After establishing these basic parameters, directly measure the insulator string length using a steel tape measure—specifically, measure the distance between the U-shaped hanging ring and the tension clamp hanging ring—to fulfill actual data requirements and improve calculation accuracy.
Span distance measurement should be performed three times, and the average value of the three readings should be used to ensure the measurement reflects real conditions, reduces safety risks, enhances measurement reliability, and avoids calculation errors caused by insufficient data precision.
Upon completion of all measurements, calculate the conductor cutting length. This calculation can be initially performed using specialized software to obtain precise results. These results then serve as a reference for subsequent construction activities, ensuring alignment with actual field requirements and preventing improper installation.
2.5 Conductor Crimping and Fitting Installation
In this construction step, first clean the inner layers and outer surface of the conductor thoroughly. Then, according to the specified crimping length, ensure the conductor is fully inserted into the expanded bore of the compression fitting to achieve complete filling, thereby enhancing crimping quality.
Next, apply thermally conductive contact grease evenly onto the contact surfaces, covering the outer aluminum strands of the conductor. Attention must be paid to construction quality to prevent defects.
Afterward, perform crimping of the tension clamp, strictly following the required construction procedures. Wrap the crimping area of the clamp with plastic film to facilitate demolding. Once crimping is complete, grind the crimped section to ensure a smooth transition and maintain overall construction quality.
Finally, install the fittings in strict accordance with relevant specifications and design requirements to ensure installation meets practical needs and minimizes potential issues.
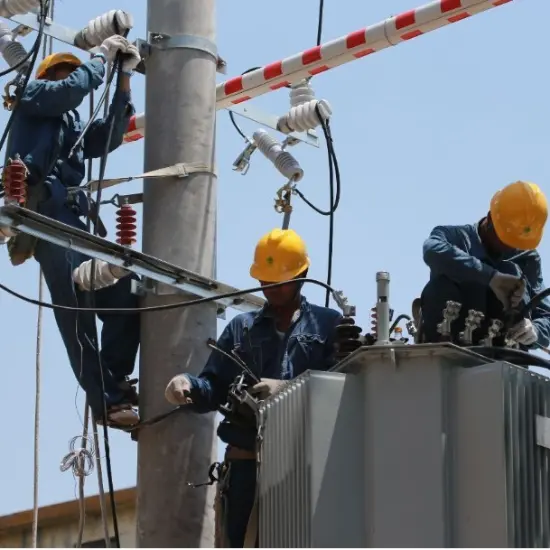
2.6 Conductor Installation
To meet basic construction requirements, this installation step must be carried out in compliance with conductor installation standards. For detailed installation diagrams, please refer to the basic content shown in Figure 2.

Installation work should be carried out in accordance with the basic content shown in Figure 2, which can satisfy the fundamental requirements of actual construction, ensure proper conductor installation quality, reduce safety hazards, and comprehensively improve construction service quality.
During the actual installation process, the conductor is first transported to the designated construction location. Then, a crane is used to lift the conductor. After one end is connected, lifting continues until both ends are fully installed. During the lifting process, care must be taken to avoid hard friction between the conductor and the ground, so as to prevent permanent deformation that could impair the conductor’s performance.
Referring to the basic configuration in Figure 2, one end of the insulator string is lifted first, while the other end is connected to the conductor. Subsequently, the steel wire rope is tightened to finally connect the conductor’s U-shaped hanging ring to the structural frame’s hanging point, thereby meeting actual construction requirements.
During this process, construction personnel must ensure that the conductor does not rub against or collide with any ground equipment, thus guaranteeing installation quality, minimizing safety risks, comprehensively enhancing the service capability of the UHV substation, and enabling the power system to better serve electricity consumers.
2.7 Re-measurement of Sag
After construction, to verify the quality of sag implementation, a re-measurement of sag must be conducted based on actual site conditions. The primary purpose of this step is to ensure sag quality, eliminate deviations, and confirm that the vertical difference between the lowest point of the conductor and the suspension points is appropriate.
In practice, a leveling instrument is set up at a point near the conductor’s underside, and the horizontal reference plane is calibrated. A leveling rod is then held vertically at the suspension point, and the reading is taken through the leveling instrument. Next, a laser distance meter is placed at the position corresponding to the rod reading to measure the distance between the horizontal reference plane and the suspension point. This measurement is repeated multiple times, and the average value is calculated.
Then, the distance from the conductor to the horizontal reference plane is measured, and the minimum value is selected. Finally, sag is calculated using Equation (2):
factual = h₁ – h₂ (2)
Using the above formula, the actual sag value can be determined, satisfying basic construction requirements, ensuring reasonable sag control, enabling proper quality control of jumper installation, comprehensively improving construction effectiveness, and effectively promoting overall construction quality.
3. Conclusion
This paper, based on the actual conditions of UHV substations, first briefly reviews the fundamental aspects of UHV substations and then investigates the inter-bay jumper installation techniques. By aligning with the specific requirements of jumper construction, the study ensures rational control over the entire installation process. This guarantees that the jumper installation methodology meets the basic operational needs of UHV substations, enhances their service capabilities, reduces safety hazards, and comprehensively supports UHV substations in delivering high-quality voltage step-up services to the power system.