7 Key Steps to Ensure Safe and Reliable Installation of Large Power Transformers
1. Maintaining and Restoring the Factory Insulation Condition
When a transformer undergoes factory acceptance tests, its insulation condition is at its optimal state. Thereafter, the insulation condition tends to deteriorate, and the installation phase may be a critical period for sudden degradation. In extreme cases, the dielectric strength may drop to the point of failure, leading to coil burnout immediately upon energization. Under normal circumstances, poor installation quality leaves behind varying degrees of latent defects. Therefore, maintaining and restoring the insulation condition to its original factory state should be the primary objective of the installation process. The difference between the insulation condition after installation and that at the factory serves as a key benchmark for evaluating the quality of installation work.
To maintain and restore insulation integrity, it is essential to prevent contamination and maintain cleanliness. Contaminants can be classified into three types: solid impurities, liquid impurities, and gaseous impurities.
Solid Impurities: All components to be installed must be thoroughly cleaned. Cleaning should continue until wiped with a lint-free white cloth, showing no discoloration or visible particles.
Liquid and Gaseous Impurities (mainly moisture): The most effective method is vacuum treatment, consisting of two main procedures:
(1) Vacuum Drying and Degassing:
After all accessories are installed, install a blanking plate on the flange at the gas relay side of the tank. Open all valves connecting accessories to the main body so that all components (including coolers), except the conservator and gas relay, are evacuated together with the main tank.
Install a vacuum valve or standard stop valve at the oil inlet on the top of the tank.
Before evacuating the tank, perform a vacuum test on the piping alone to verify the actual vacuum level achievable by the vacuum system. If the vacuum exceeds 10 Pa, check for leaks in the piping or service the vacuum pump.
Monitor the tank continuously for leaks during evacuation.
Once the vacuum pump reaches its maximum possible vacuum (not exceeding 133.3 Pa), keep the pump running to maintain this vacuum level. The vacuum pump should operate continuously for no less than 24 hours.
(2) Vacuum Oil Filling:
Continue operating the vacuum pump during oil filling. Keep all valves open as during vacuuming so that all components and accessories are filled simultaneously with the main tank.
Use a vacuum oil purifier. Oil should be injected through the bottom oil inlet valve of the tank, allowing oil to flow from outside the windings inward, minimizing stress on the barriers.
When the oil level is approximately 200–300 mm below the tank cover, close the vacuum valve and stop evacuation, but continue oil filling with the vacuum oil purifier.
For transformers without on-load tap changers (OLTC), filling can continue until the oil level approaches the gas relay blanking plate before stopping the oil purifier.
For OLTC-equipped transformers, stop the oil purifier as soon as the insulating cylinder of the selector switch is filled, to allow disconnection of the switch from the tank.
In all cases, fill the tank as completely as possible to minimize residual air volume. When breaking vacuum and topping up oil, only a small amount of air enters the upper space. This air will be expelled into the conservator and will not adversely affect the core insulation.
It should be emphasized that the key lies in proper vacuum oil filling; one should not rely heavily on hot oil circulation afterward. During hot oil circulation, only moisture that has migrated from paper insulation into the oil can be removed by the vacuum oil purifier. However, moisture already absorbed into the paper is difficult to release back into the oil, and the equilibrium between oil and paper moisture is very slow.
2. Oil Leakage Issues
Oil leakage is a common and prominent problem in transformers. Causes are numerous, with design and manufacturing defects being significant factors (e.g., improper sealing design, poor machining, or inadequate welding quality). On-site installation errors and careless workmanship also contribute significantly (e.g., inadequate cleaning of flange surfaces, presence of oil, rust, weld spatter; aged gaskets with lost elasticity; uneven flange mating surfaces not corrected).
Addressing oil leakage requires meticulous work:
Before installation, perform pressure sealing tests on coolers, conservators, risers, and oil purifiers, and promptly repair any leaking parts.
Carefully inspect and prepare all flange sealing surfaces. Any misalignment during lifting must be corrected before installation; serious cases should be addressed jointly with the manufacturer.
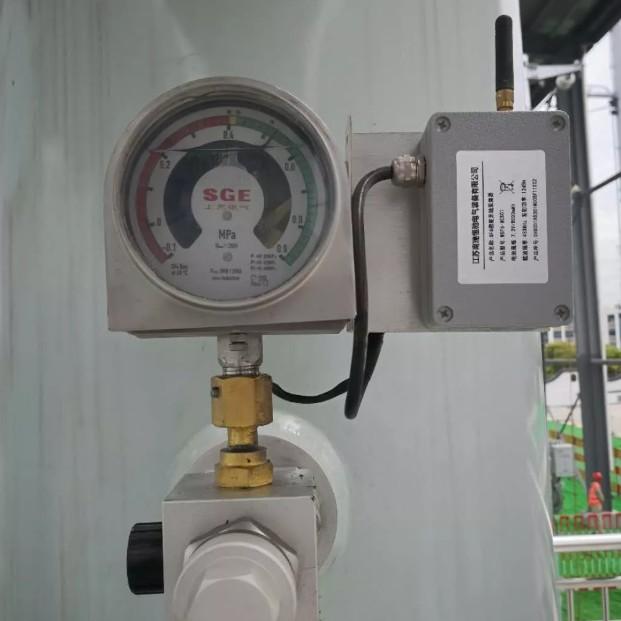
After installation, conduct an overall sealing test: apply no more than 0.03 MPa pressure on the tank cover for 24 hours, with no oil leakage allowed.
3. Partial Discharge Test
A partial discharge (PD) test refers to an induced voltage withstand test with PD measurement capability. According to GB 50150-91:
Partial discharge tests are recommended for 500 kV transformers.
For 220 kV and 330 kV transformers, PD tests are recommended if testing equipment is available.
Although the test voltage for PD testing is lower than that of standard induced voltage tests, the duration is extended by over 60 times. Combined with sensitive instruments monitoring internal discharge development, the destructive potential is controllable. Thus, PD testing combines characteristics of both non-destructive and destructive tests, effectively detecting insulation defects. As a result, it has gained rapid popularity. Most project owners now perform PD tests on newly installed or overhauled transformers, achieving significant benefits—early detection of installation flaws, identification of unstable factory PD performance, and ensuring successful initial energization.
4. Impulse Closing Test at Rated Voltage
The impulse closing test at rated voltage is primarily intended to verify whether the magnetizing inrush current generated during energization will cause the transformer differential protection to operate. It is not designed to test the insulation strength of the transformer.
In fact, during the impulse closing test, aside from relay protection monitoring, there are no instruments to detect possible overvoltages, and no measurable data is recorded. Therefore, from the perspective of insulation assessment, the test lacks conclusive value and is essentially meaningless.
That said, insulation failures in transformers have occurred during impulse closing tests—usually due to pre-existing serious defects that become apparent immediately upon energization. Conversely, there are numerous cases where transformers passed five impulse closures without issue, yet failed (burned out) within minutes to days after commissioning.
5. Insulation Condition Assessment
Insulation condition assessment includes measuring insulation resistance, absorption ratio, polarization index, DC leakage current, and dielectric loss tangent (tan δ).
After installation, the transformer’s insulation condition may have deteriorated to varying degrees compared to factory conditions, and measurement methods between site and factory may differ. Therefore, when comparing commissioning test results with factory data, comprehensive analysis is required to make accurate judgments. These results should also serve as a baseline for future preventive testing.
It is particularly important to note: when insulation resistance is very high, the absorption ratio may decrease. In such cases, an absorption ratio below 1.3 should not automatically be attributed to moisture in the insulation.
6. Understanding and Function of the Breather
If the bladder in the conservator is analogous to the lung, then the breather acts as the nose. When load or ambient temperature increases, causing the oil in the tank to expand, the bladder "exhales" through the breather to prevent excessive pressure. Conversely, it "inhales" to prevent vacuum formation in the tank. If the breather becomes blocked, minor consequences include false oil level indications; severe cases may trigger gas relay or pressure relief device operation, leading to accidents.
Breather blockage can occur not only if the shipping seal is forgotten to be removed but also during operation due to:
Moisture absorption and degradation of the desiccant (color-changing silica gel)
Accumulation of dust in the oil cup
Therefore, two maintenance tasks are essential:
Ensure the silica gel in the breather has sufficient moisture-absorbing capacity and prevent saturation. Replace or regenerate the silica gel when 1/5 of it has changed color.
Regularly clean the oil cup, refill with clean oil, and maintain the oil level above the air baffle to ensure incoming air passes through an oil bath, filtering out dust particles.