How do you wire up a 3-phase motor?

10/18/2024

The main steps for connecting a three-phase motor are as follows:

I. Preparation work

Determine motor parameters

Before connecting a three-phase motor, first determine the motor's rated voltage, rated power, rated current and other parameters. These parameters can usually be found on the motor's nameplate. For example, the nameplate of a three-phase asynchronous motor may be marked with "rated voltage 380V, rated power 15kW, rated current 30A". According to these parameters, a suitable power supply and control equipment can be selected.

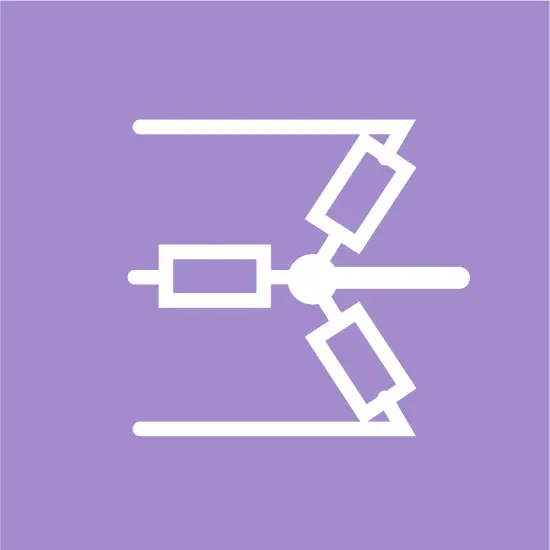
At the same time, it is necessary to understand the motor's wiring method, which is generally divided into two types: star (Y) connection and delta (Δ) connection. Different wiring methods are suitable for different voltage and power requirements.

Prepare connection materials and tools

According to the motor's parameters and installation environment, prepare corresponding connection materials such as cables, wiring terminals, wire ducts, etc. The specification of the cable should be selected according to the motor's rated current and installation distance to ensure that it can safely transmit power. For example, for a motor with a rated current of 30A, a cable with a cross-sectional area of 6 square millimeters may be required.

Prepare the tools required for connection, such as screwdrivers, wrenches, wire strippers, crimping pliers, etc. Ensure the quality and applicability of the tools to facilitate smooth connection operations.

II. Connecting the power supply

Select a suitable power supply

A three-phase motor requires a three-phase AC power supply. According to the motor's rated voltage, select a suitable power supply voltage, generally 380V or 220V (stepped down by a transformer). Ensure that the capacity of the power supply can meet the motor's starting and running requirements, and avoid the motor being unable to start normally or run unstably due to insufficient power supply capacity.

At the same time, ensure that the phase sequence of the power supply is correct, that is, the phase sequence of the three-phase power supply meets the requirements of the motor. If the phase sequence is wrong, the motor may rotate in reverse and the phase sequence needs to be adjusted to run normally.

Connect the power cord

Connect the three-phase power cord (usually three live wires and one ground wire) to the motor's junction box. According to the motor's wiring method, connect the three live wires to the three wiring terminals of the motor respectively, and connect the ground wire to the motor's grounding terminal. For example, for a motor with star connection, connect the three live wires to the three terminals in the motor junction box respectively, and then connect the three terminals together with a short connection wire to form a star connection.

When connecting the power cord, ensure a firm connection to avoid overheating or fire caused by poor contact. A crimping pliers can be used to compress the wiring terminals to ensure good contact between the wire and the terminal. At the same time, pay attention to the insulation of the wire to avoid short circuits between wires or between the wire and the motor casing.

III. Connecting control equipment

Select control equipment

According to the motor's control requirements, select suitable control equipment such as circuit breakers, contactors, thermal relays, frequency converters, etc. Circuit breakers are used to protect the motor and power supply lines from overcurrent and short-circuit faults; contactors are used to control the motor's start and stop; thermal relays are used to protect the motor from overload; frequency converters can adjust the motor's speed and output power.

The specifications and parameters of the control equipment should be selected according to the motor's rated current, power and control requirements to ensure safe and reliable control of the motor's operation.

Connect the control circuit

According to the wiring diagram of the control equipment, connect the control circuit. Generally speaking, the control circuit includes power supply circuits, control signal circuits and protection circuits. For example, connect the output end of the circuit breaker to the input end of the contactor, connect the output end of the contactor to the power cord of the motor; connect the normally closed contact of the thermal relay in series in the control circuit to protect the motor from overload; connect the control signal circuit to the control coil of the contactor to control the on and off of the contactor.

When connecting the control circuit, pay attention to the correctness and reliability of the circuit. Ensure accurate transmission of control signals and normal operation of protection devices. At the same time, pay attention to the insulation and grounding of the circuit to avoid electrical accidents.

IV. Inspection and testing

Check the connection

After completing the connection of the motor, carefully check whether the connection is correct and firm. Check whether the wire connection meets the requirements, whether the wiring terminals are compressed, and whether the grounding is good. A multimeter and other tools can be used to check the resistance and insulation between wires to ensure that there are no short circuits and grounding faults.

At the same time, check whether the settings of the control equipment are correct, such as whether the rated current of the circuit breaker and the protection current of the thermal relay match the motor's parameters. Ensure that the control equipment can work normally and protect the safe operation of the motor.

Test the motor

After checking that the connection is correct, the motor can be tested. First, disconnect the motor's load and perform a no-load test. Start the motor and observe whether the rotation direction of the motor is correct, whether the motor runs smoothly, and whether there are abnormal noises and vibrations. If the motor rotates in reverse, the phase sequence of the power supply can be adjusted; if the motor runs unstably or has abnormal noises and vibrations, the motor should be stopped immediately, and the cause should be checked and eliminated.

After the no-load test is normal, the load can be connected for load test. Gradually increase the motor's load and observe the motor's running condition. Check whether the motor's current, temperature and other parameters are normal. If an abnormality is found, the motor should be stopped in time, and the cause should be checked and eliminated.

In short, connecting a three-phase motor requires careful preparation, correct connection and strict testing to ensure that the motor can operate safely and reliably. During the connection process, if there are problems or uncertainties, professional personnel should be consulted in time or relevant information should be consulted to avoid motor damage or electrical accidents caused by incorrect connection.


The Electricity Encyclopedia is dedicated to accelerating the dissemination and application of electricity knowledge and adding impetus to the development and innovation of the electricity industry.

What factors need to be considered when designing a transformer?
Transformer design is a complex process that requires consideration of multiple factors to ensure safe and efficient operation. In addition, compliance with international and local regulations is essential to guarantee that transformers meet safety and performance standards. Below are key factors to consider in transformer design and the relevant regulations to follow:Transformer Design Factors: Voltage and Frequency: Determine the input and output voltage levels and the operating frequency. The
Vziman
09/02/2025
What failure modes are possible in a transformer? How to identify and fix these failures?
Transformers are critical components in power systems, and various failure modes can affect their operation. Timely identification and resolution of these failure modes are essential to prevent costly downtime and ensure system reliability. Below are some common transformer failure modes, along with methods to identify and address them: Insulation FailureIdentification: Insulation failure leads to decreased insulation resistance, which can be detected through insulation resistance testing (megge
09/02/2025
Fault Analysis and Treatment of Oil-Immersed Transformers
Oil Leakage at Welded JointsOil leakage at welded joints primarily stems from poor welding quality, such as incomplete or detached welds, and defects like pinholes and gas pores. Although oil-immersed transformers are initially coated with solder and paint during manufacturing, potentially masking these issues temporarily, the defects tend to surface during operation. Additionally, electromagnetic vibration can cause weld cracks, leading to oil leakage.To resolve such leaks, the first critical s
08/29/2025
Transformer Connection Sections
Transformer Connection DesignationsThe transformer connection designation indicates the winding connection method and the phase relationship between the line voltages of the primary and secondary windings. It consists of two parts: letters and a number. The letters on the left denote the connection configurations of the high-voltage and low-voltage windings, while the number on the right is an integer from 0 to 11.This number represents the phase shift of the low-voltage winding's line voltage r
08/15/2025
Inquiry
Download
IEE-Business is dedicated to serving the personnel in the global power industry.
Join IEE-Business, not only can you discover power equipment and power knowledge, but also canhnd like - minded friends!