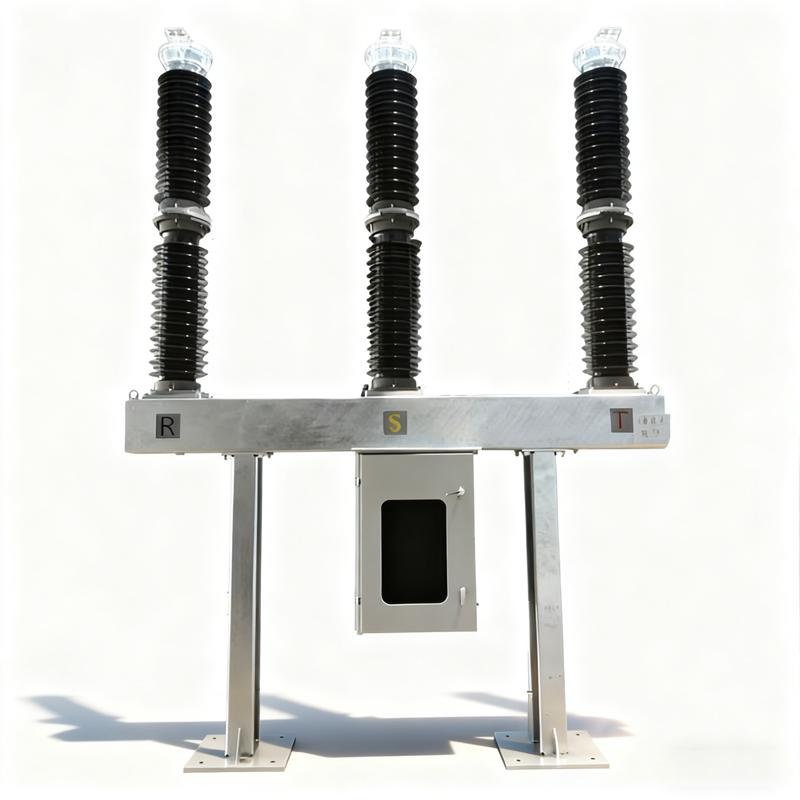
7 Common VCB Failures and How to Fix Them

Fault Analysis and Troubleshooting of High-Voltage Vacuum Circuit Breakers
Introduction: Advantages and Evolution
High-voltage vacuum circuit breakers (VCBs) offer significant advantages over traditional oil or SF₆-based breakers, including:
Oil-free and environmentally friendly design
High dielectric strength in vacuum
Excellent arc-quenching capability
Long electrical and mechanical life
Compact size, light weight
Suitable for frequent operation
Fire-resistant and low maintenance
These benefits have made VCBs the preferred choice in medium- and high-voltage power systems, widely adopted by utilities, engineers, and maintenance teams.
However, early domestic models in China faced challenges such as inconsistent quality, high current chopping overvoltage, and occasional vacuum leakage. A turning point came at the 1992 Tianjin Vacuum Switch Application Promotion Conference, after which Chinese manufacturing technology rapidly advanced to match international standards.
Despite their high reliability, vacuum circuit breakers may still experience operational faults. This article analyzes seven common failure modes, identifies root causes, and provides practical troubleshooting solutions to ensure safe and stable operation.
Common Abnormal Operating Conditions

Root Cause Analysis and Diagnostic Methods
1. Failure to Close or Open
Symptom: Solenoid operates, latch releases, but mechanism does not drive contact motion.
Cause: Excessive clearance or wear in mechanical linkages—particularly at the universal joint connecting the main lever arm.
Diagnosis: Confirm secondary control circuit integrity first. If electrical signals are normal, inspect mechanical transmission components for looseness or deformation.
2. Unintended Tripping (False Tripping)
Symptom: Breaker trips unexpectedly during normal service.
Cause: Short circuit in auxiliary switch contacts due to moisture ingress.
Root Cause: Rainwater enters the mechanism box, flows down the output crank arm, and causes insulation failure between auxiliary switch contacts, energizing the trip coil unintentionally.
3. Storage Motor Runs Continuously After Spring Charging
Control Logic:
Closing → auxiliary switch closes → motor starts.
Spring fully charged → limit switch opens (normally closed contact) → motor stops.
Failure Cause: The limit switch lever fails to actuate, leaving the normally closed contact closed and the motor circuit energized.
Diagnosis: Check mechanical linkage between the spring mechanism and limit switch for misalignment or jamming.
4. Increased DC Contact Resistance
Impact: Elevated resistance → increased temperature rise → risk of thermal runaway and contact welding.
Cause:
Contact erosion due to repeated interruptions.
Reduced contact spring pressure.
Changes in contact gap and overtravel.
Measurement: Use DC voltage drop method with test current ≥100A per IEC/GB standards.
Acceptance Criterion: Resistance must be within ±20% of initial value and below manufacturer’s limit.
5. Excessive Closing Bounce Time
Standard: Closing bounce should be ≤2ms.
Consequences: Prolonged bounce causes arcing, contact burning, and potential welding.
Causes:
Weakened contact spring force.
Wear in pins, levers, and hinge joints.
Misalignment in drive mechanism.
6. Discharge from CT Surface to Support Bracket
Location: Middle chamber, where the current transformer (CT) is mounted.
Cause: Loss of semiconductor coating on CT surface due to scraping during assembly (especially around mounting bolts).
Effect: Localized electric field distortion → surface discharge to grounded bracket.
Risk: Partial discharge → insulation degradation → eventual flashover.
7. Vacuum Interrupter Fails to Open
Critical Risk: Inability to interrupt fault current → system instability or equipment damage.
Primary Cause: Loss of vacuum integrity.
Low vacuum → ionization inside chamber → reduced dielectric strength.
Charged particles prevent arc extinction.
Detection: Use vacuum degree tester (high-frequency withstand voltage method) or observe abnormal glow during operation.
Troubleshooting and Corrective Actions
1. Failure to Close or Open
Solution:
Inspect all mechanical linkages for wear, deformation, or excessive clearance.
Replace worn universal joints, pins, and levers with high-hardness, precision-machined components.
Ensure proper lubrication and alignment.
2. Unintended Tripping
Solution:
Seal all entry points in the mechanism box (cable entries, shaft seals).
Install silicone protective sleeves on the output crank linkage.
Activate heating and moisture-removal devices to prevent condensation.
Use auxiliary switches with higher IP protection rating (e.g., IP55).
3. Storage Motor Runs Continuously
Solution:
Adjust the position and travel of the limit switch.
Ensure the actuating lever fully opens the normally closed contact when the spring is fully charged.
Verify switch operation under load conditions.
4. Increased DC Contact Resistance
Solution:
Measure and adjust contact gap and overtravel.
Re-torque connections and clean contact surfaces if accessible.
If resistance remains high after adjustment, replace the vacuum interrupter.
Record baseline resistance values during commissioning for trend analysis.
5. Excessive Closing Bounce
Solution:
Slightly increase initial contact spring pressure (within design limits).
Replace worn pins and levers (clearance > 0.3mm).
Optimize drive mechanism geometry: shift linkage slightly toward the dead center position in the closed state to reduce impact velocity and bounce.
6. CT Surface Discharge
Solution:
Clean the CT surface thoroughly.
Reapply a uniform layer of semiconductor paint around the entire circumference, especially near mounting points.
Allow proper curing time before re-energizing.
Conduct partial discharge test post-repair to verify effectiveness.
7. Vacuum Interrupter Fails to Open
Solution:
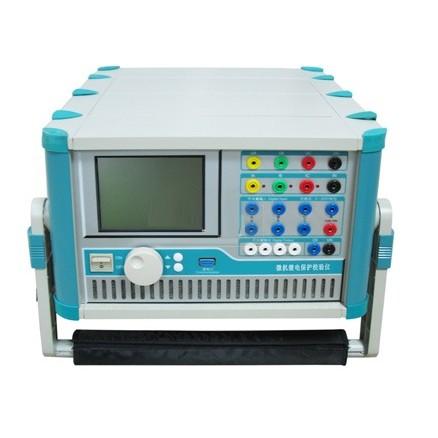
Use a circuit breaker analyzer to measure:
Make fine adjustments until all parameters meet specifications.
Opening/closing speed
Three-phase synchronization
Closing bounce time
Adjust overtravel via the insulating pull rod’s threaded connection.
Adjust contact gap by modifying the length of the moving conductive rod.
Ensure the new unit passes factory vacuum integrity test.
Install vertically; align the moving rod with the drive mechanism.
Avoid torsional stress during installation.
Confirm vacuum level using a vacuum tester.
Replace the faulty interrupter:
Post-installation adjustments:
Perform comprehensive testing: