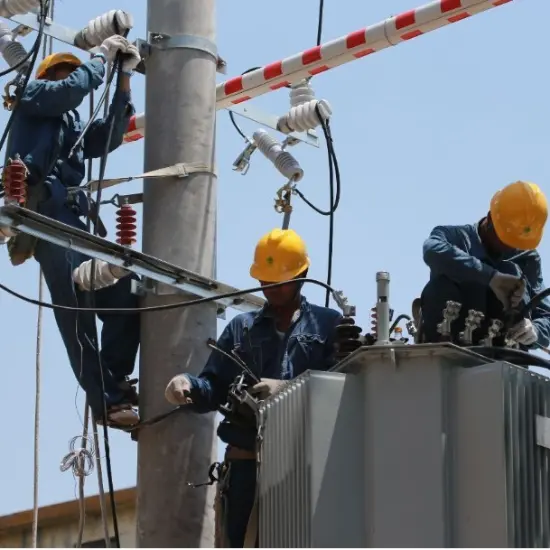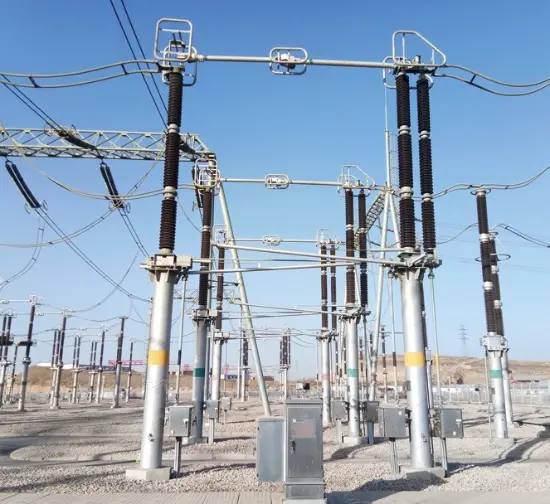
In substations, the number of isolating switches is generally 2 to 4 times that of circuit breakers. Due to their large quantity, the workload for installation and commissioning is considerable. For voltage levels below 110 kV, the GW4-type isolating switch serves as the dominant equipment. If the installation workmanship and mechanical dimensional adjustments of the isolating switch do not meet requirements, issues such as incomplete opening/closing, overheated contacts, or even porcelain insulator fracture may occur. Therefore, it is highly necessary to summarize the installation and commissioning methods for isolating switches. Based on the author’s practical experience, the installation and commissioning procedures for this type of isolating switch are summarized below for reference by peers.
1.Structure and Operating Principle of the GW4-Type Isolating Switch
To better master the installation techniques and commissioning methods, it is essential to have a sufficient understanding of the switch’s structure and operating principle.
1.1 Structure of the Isolating Switch
1.1.1 Structure of the Isolating Switch
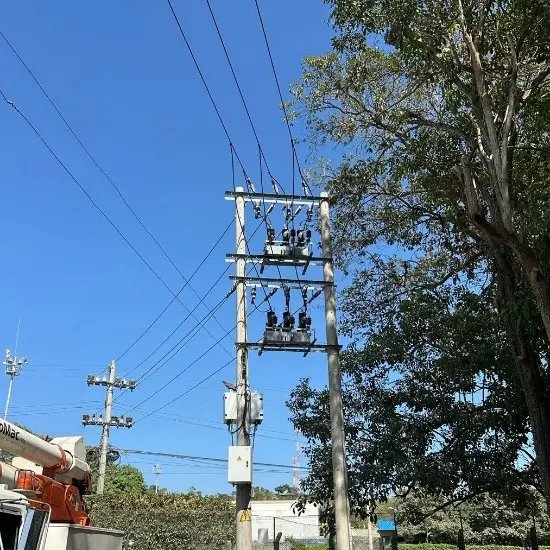
The GW4-type isolating switch features a double-column horizontal rotating structure, consisting of three single-phase units. Each single-phase unit comprises a base, insulating支柱 (insulating columns), and conductive parts, and is equipped with either manual or electric operating mechanisms.
1.1.2 Structure of the Earthing Switch
The earthing switch consists of a stationary contact fixed on the conductive tube of the isolating switch and a movable contact rod mounted on the base.
1.1.3 Structure of the Manual Operating Mechanism
The manual operating mechanism includes an operating handle that rotates 90° (or 180°) in a horizontal (or vertical) plane, a rainproof cover, and an auxiliary switch housed inside.
1.1.4 Electric Operating Mechanism
The main components of the electric operating mechanism include an electric motor, gear reducer, auxiliary switch, limit switch, selector switch, contactor, and circuit breaker.
1.2 Operating Principle of the Isolating Switch
1.2.1 Operating Principle of the Isolating Switch
When the operating mechanism’s output shaft rotates 90° (or 180°), it drives the vertical tube → operating shaft rotates 90° (or 180°) → operating crank arm → active pole of the operated phase rotates 90° → horizontal linkage rod → active poles of the other phases rotate 90° → cross linkage rod → driven poles rotate oppositely by 90°, achieving three-pole interlocking operation.
1.2.2 Operating Principle of the Earthing Switch
The operating mechanism drives the transmission shaft and horizontal linkage rod to rotate the earthing switch’s rotating shaft by a certain angle, thereby achieving opening or closing.
1.2.3 Operating Principle of the Manual Operating Mechanism
When the handle is operated, the output shaft of the mechanism rotates, driving the auxiliary switch connected to the main shaft. During opening or closing operations, corresponding contacts are opened or closed to send respective open/close signals.
1.2.4 Operating Principle of the Electric Operating Mechanism
The motor starts, driving the worm gear reduction unit; the main shaft rotates, actuating the connected isolating switch to open or close.
2.Installation of the Isolating Switch
2.1 Principles of Installation
Proper installation and commissioning are prerequisites for normal operation of the isolating switch. In a sense, good installation constitutes half of successful commissioning. Therefore, during installation, the principle of “level horizontally and plumb vertically” must be strictly followed.
(1) The bases of all three phases must be vertically aligned—i.e., lie in the same horizontal plane—to ensure the horizontal linkage rods remain coplanar.
(2) The bases of all three phases must be flush front-to-back—i.e., the driven and driving poles of each phase must respectively lie in the same vertical plane—to ensure the horizontal linkage rods remain coplanar.
(3) The bases of all three phases must be parallel left-to-right to ensure proper coordination of horizontal linkage rod lengths.
(4) The porcelain insulators of all three phases must be perfectly vertical—to keep horizontal linkage rods coplanar and ensure good contact surface alignment.
(5) The output shaft of the operating mechanism must be coaxial with the operating shaft of the operated phase—to minimize required operating torque.
2.2 Installation Requirements for Individual Components
(1) Insulating parts—must be intact and meet specifications.
(2) Rotating (transmission) parts—must be lubricated, flexible, and free of binding; if not, apply MoS₂ or similar grease.
(3) Fixed parts—must be securely fastened without looseness.
2.3 Precautions During Installation
(1) Rated current must comply with design requirements.
(2) Installation direction of the earthing switch must meet requirements. For single-side earthing, it can be left- or right-grounded; typically, the earthing switch is located on the switch side.
(3) Opening direction of the isolating switch must meet requirements. When facing the operating mechanism, the opening direction of the isolating switch should align with the observer’s line of sight.
(4) Left and right contact positions must be correctly installed: the left contact (finger contact side) is mounted on the driving pole side, and the right contact (contact head side) on the driven pole side.
(5) The main blade operating mechanism is usually installed beneath the phase A operating shaft.
(6) Phase-to-phase distance: not less than 2 m for 110 kV, and not less than 1.2 m for 35 kV.
3.Commissioning of the Isolating Switch
3.1 Essence of Commissioning
The essence of commissioning is, based on correct and reasonable installation, to adjust all mechanical dimensions and angles to meet standard requirements.
3.2 Commissioning Procedure (from bottom to top)
3.2.1 Adjustment of the Base
(1) Adjust the flatness of the base.
(2) The length and angle of Crank Arm 1 (connected to the horizontal linkage rod) and Crank Arm 2 (connected to the cross linkage rod) must be consistent across all three phases. Crank Arm 3 (connected to the main blade operating crank arm) varies by manufacturer: some install it on the base shaft (as shown in Figure 1); others require on-site welding onto the horizontal linkage rod. When product documentation provides adjustment instructions, follow them; otherwise, adjust so that after connecting the mechanism to the switch body, the opening/closing angles and synchronization are appropriate. (If Crank Arms 1 and 2 are welded to the shaft, their angle and length are non-adjustable.)
(3) Adjust the positioning screw so that the clearance between it and the positioning stop plate is 1–3 mm.

3.2.2 Adjustment of Porcelain Insulators
Adjustment can be made using shims, but note that the thickness of shims added at any single location shall not exceed 3 mm, and all shims added at the same location shall be welded together.
(1) The verticality of the porcelain insulators shall meet requirements.
(2) The heights of the two porcelain insulators on a single pole shall be identical.
3.2.3 Adjustment of Conductive Contacts
Loosen the screws on the terminal block that secure the conductive rod, then rotate or shift the conductive rod to achieve proper alignment.
(1) The two conductive rods (left and right) on a single pole must be aligned—i.e., their heights shall be consistent, with a vertical height difference of less than 5 mm, and they shall lie in a straight horizontal line, as shown in Figure 2.
(2) The lengths of the left and right conductive rods across all three phases shall be identical.
(3) The insertion depth of the contact fingers into the contacts shall be the same for all three phases. If the manufacturer’s manual specifies a numerical value, adjust according to that value; if no value is given but Figure 3 is provided, adjust according to Figure 3; if neither a numerical value nor Figure 3 is available, adjust based on experience. If the insertion is too shallow, the contact area after closing will be insufficient; if too deep, excessive impact force during closing may damage the insulator. Therefore, after closing, a clearance (margin) of 4–6 mm should be maintained between the contact fingers and the contact base, and the insertion depth of the contact fingers during closing shall be no less than 90% of the total contact depth.

3.2.4 Adjustment of the Operating Pole
(1) Adjustment of Open Distance:
After the isolating switch is opened, the angle between the conductive rod and the centerline of the base should be within 90°–92°. If it is difficult to measure the angle accurately, a simple method is to use a tape measure to check whether the left and right conductive rods are parallel at both ends. A difference of ±10 mm between the distances at the two ends is acceptable.
(2) Adjustment Between Operating Pole and Operating Mechanism:
Place both the operating pole body and the mechanism in the closed position, then connect them (if using a flexible connection). If it is a rigid connection, temporarily tack-weld the joint first (perform full welding only after all adjustments are completed). Perform one complete open-close operation and observe whether the operating pole reaches full open or closed positions.
If the pole fails to close fully, adjust the length of the cross linkage rod: “lengthen if closure is insufficient; shorten if over-closed.”
If the pole fails to open fully, adjust the length of the operating crank arm (i.e., Crank Arm 3 in Figure 1): “shorten if opening angle is too small; lengthen if too large.”
Note: “Shortening for insufficient opening” can be achieved in two ways: either by increasing the length of the operating crank arm or by increasing its included angle; conversely, “lengthening” can be done by reducing the angle or shortening the arm.
Additionally, the angular travel of the pole body and the mechanism must be consistent. Therefore, when adjusting the operating crank arm, both the opening angle and the mechanism’s travel angle must be considered simultaneously.
If the pole body has reached proper open/closed position but the mechanism has not, this indicates the mechanism’s travel (or angle) is less than that of the body. In this case, reduce the pole body’s required travel by shortening the operating crank arm.
Conversely, if the mechanism reaches position but the pole body does not, lengthen the operating crank arm.
3.2.5 Three-Pole Interlocking Adjustment
Three-pole interlocking adjustment must be performed under the condition that all terminal plates of the isolating switch are subjected to normal busbar tension. Otherwise, re-adjustment will be necessary after the busbars are connected.
After the operating pole (e.g., Phase A) is properly adjusted, place all three poles in the closed position, install the horizontal linkage rods, and perform one full open-close cycle. Observe whether the other two poles reach proper open/closed positions.
The standard for three-pole synchronization is based on simultaneous contact engagement. During adjustment, when the contact of any one pole just touches its contact finger, measure the gaps between the contacts and contact fingers of the other two poles, and adjust these gaps by modifying the length of the cross linkage rods.
If, after achieving synchronization, the open/close positions are still not not fully reached, apply the “compromise method”: take the midpoint between the over-travel and under-travel values and adjust toward this median—while ensuring compliance with the manufacturer’s specified synchronization tolerance.
Common scenarios (assuming Phase A is the operating pole):
(1) All three poles are synchronized but none reach full open/close position → slightly adjust the operating crank arm length.
(2) All three poles reach proper open/close positions but are out of sync → use the compromise method on cross linkage rods to meet synchronization standards.
(3) Phases A and B are synchronized, but Phase C is not (yet all operate correctly) → adjust Phase C’s cross linkage rod.
(4) Phases B and C are synchronized, but Phase A is not → adjust Phase A’s cross linkage rod.
(5) Phases A and C are synchronized, but Phase B is not → adjust Phase B’s cross linkage rod.
(6) All three poles are synchronized, but Phases A and B do not reach the fully closed/open position → either adjust the horizontal linkage rod between Phases A and B to bring them into proper position, or adjust Phase C’s cross linkage rod so that its incomplete travel matches that of Phases A and B, then readjust the operating crank arm length.
(7) All three poles are synchronized, but Phases B and C do not reach the fully closed/open position → adjust the horizontal linkage rod between Phases B and C, or adjust Phase A’s cross linkage rod to match the incomplete travel of Phases B and C, then adjust the crank arm length.
(8) All three poles are synchronized, but Phases A and C do not reach the fully closed/open position → adjust both the AB and BC horizontal linkage rods, or adjust Phase B’s cross linkage rod to match the incomplete travel of Phases A and C, then adjust the crank arm length.
(9) Worst-case scenario: all three poles are both out of synchronization and incomplete travel → comprehensively adjust the horizontal linkages, cross linkages, and the operating crank arm using the compromise method to meet the required specifications.
Thus, the principle of three-pole interlocking adjustment is: synchronization must meet specifications, closing must be precise, and opening must satisfy the required contact gap distance. Generally, if conflicts arise among these three criteria, the opening contact gap takes priority, and minor sacrifice of opening distance may be acceptable if needed.
(Note: For cross and horizontal linkage rods with opposite-threaded ends, try to keep the exposed thread lengths equal on both sides during adjustment.)
3.2.6 Adjustment of Open/Close Positioning Screws
After completing three-pole interlocking adjustment, tighten the lock nuts on the cross and horizontal linkage rods. Then adjust the clearance between the open/close positioning screws and the stop plate to 1–3 mm.
3.3 Commissioning of the Earthing Switch
Commissioning of the earthing switch is performed after the main isolating switch has been fully commissioned. The method is similar, but the following points require attention:
(1) The horizontal linkage rods of the earthing switch are mostly connected via pipe clamps. Therefore, when tightening bolts, apply torque crosswise, symmetrically, evenly, and gradually; otherwise, misalignment may occur between the earthing conductive rod and the stationary contact.
(2) Contact between the earthing conductive rod and the stationary contact must be good. Ideally, the conductive rod should protrude 3–10 mm beyond the stationary contact—though specific values vary by manufacturer and should follow the manual. Generally, since the main switch’s horizontal linkage is installed on the driving pole side, for an internal-type earthing switch with right-side grounding, the protrusion should not be excessive; otherwise, when the main isolating switch is open, the earthing blade may fail to close due to mechanical interference between the earthing rod tip and the main switch’s horizontal linkage.
(3) In the open position, the earthing conductive rod should remain horizontal. Use a spirit level if necessary to ensure the required insulation distance is maintained after opening.
3.4 Mechanical Interlock Adjustment
After commissioning both the isolating switch and earthing switch, adjust the mechanical interlock—this marks the completion of the entire isolating switch group commissioning.
Adjust the relative position of the sector plate and arc-shaped plate on the base so that:
When the isolating switch is closed, the earthing switch cannot be closed;
When the earthing switch is closed, the isolating switch cannot be closed.
3.5 Commissioning of Manual Operating Mechanism
The manual operating mechanism is adjusted concurrently with the main body. During adjustment, also verify:
(1) Smooth rotation of the mechanism—operating force on the handle should not exceed 1 kgf.
(2) Correct switching of the auxiliary switch—the standard is that the auxiliary switch reliably operates at approximately 4/5 of the travel toward the limit position during mechanism movement.
3.6 Commissioning of Electric Operating Mechanism
Commissioning of the electric mechanism is more complex than the manual type. Key inspection items include:
(1) All components are intact.
(2) Wiring is correct; perform several manual/electric and local/remote operations to confirm correct action.
(3) Before energizing for test operation, first place the mechanism at the mid-position between open and closed, then operate.
(4) Motor rotation direction must match the required open/close direction of the main body.
(5) Both electrical and mechanical limit switches must be properly adjusted and aligned with the final open/close positions of the main body.
4.Conclusion
Because isolating switches have long been regarded as simple electrical devices, operational defects such as mechanical binding and overheating in the conductive circuit frequently occur, often forcing unplanned outages and seriously affecting power supply reliability.
Familiarity with the structure, operating principles, and installation/commissioning methods of isolating switches can effectively prevent forced outages and unreliable operations, improve on-site work efficiency, and resolve the contradiction between unreliable equipment performance and the high reliability demands of modern power systems.